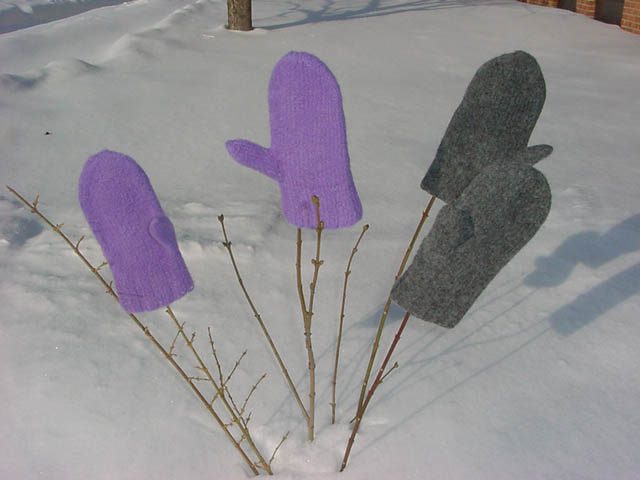
Knitting 202-Felted Mittens
|
From the Open Files of: |
NW Synod of Wisconsin Resource Center, (715) 833-1153 |
|
Contributed by: |
Pastor Mary Jorgenson, Trinity Lutheran Church, Eau Claire, WI |
Knitting 202-Felted Mittens
 |
In Knitting 202, the class will learn how to knit in the round,
how to graft stitches together, and how the fulling process works.
It is a three week class. Participants can choose to make a pair for an older child, a woman or a man. The three Bible studies revolve around theme of hands: God’s hands, Jesus’ hands, and our hands. By the end of the third session, the students will have completed only one mitten, so they’ll have to make its partner and full them after the class has concluded. |
Bible Studies:
Week One
Week Two
Week Three
Knitting Instructions:
Supplies and Instructions
Week One - [ TOP ]
This week the students will learn how to knit in the round. The pattern
is written for three double-pointed needles. But you can explain to
them that a person can
also knit in the round using four DP’s, or using two circular needles.
When I make out a supply list, I tell them they can use either DP’s or
circulars. Some students will use one method, and some the other. It’s
good for them to know there’s more than one way to skin a cat!
Get them started on knitting in the round. This first week, they’ll knit
as far as the thumb gusset. The second class starts from there. They will need
stitch markers for next week’s class.
The theme for this week’s Bible study centers on the hands of God, and
it utilizes Psalm 95.
I. God’s Hands?
Question: So, does God have hands?
We can’t really say so, and yet for us to wrap our minds around God,
we need to picture God in human terms.
The Bible, actually, speaks quite a bit about the “Hand of God.” Questions: Why would we want to describe God with hands? What do hands do? Why would they be applicable to God? (Our hands make us productive. We make things with our hands. God is the prime mover, and so hands become a chief symbol for the activity of God).
II. The Whole World in His Hands
Psalm 95 was probably used as people came to the temple in Jerusalem
to worship. It’s something of a call to worship. Each of the two sections before us
begins with an invitation to come and worship, and then we’re told why
God is worthy of our praise. The invitations begin with “O Come!” and
the reason why we should begins with “For....”
Have someone read Psalm 95:1–5.
We get two hands in this section. The first time we encounter God’s hand
comes in verse four:
“In his hand are the depths of the earth;
the heights of the mountains are his also.”
Notice the bigness! Question: How much can you hold in your hands?
How many eggs can you hold safely in one hand?
But look what God can carry! From the lows to the highs, and everything in
between. It’s everything....God holds everything in God’s hand!
Now, we know in our heads that the whole world is in God’s hands. But still,
sometimes people will say, “It’s in God’s hands.” Question:
When do people say something like that? (When a situation is out of their
control, when it’s not in their hands)
This is tough! When we say “It’s in God’s hands,” we’re
not saying that God will magically make it all better.
What we’re making here is a statement of faith. We’re saying that,
come what may, all things are in God’s hands. Both the mountain top highs
of our life, and the rock bottom lows, we’re commending them all into God’s
great hands, trusting that the one who holds the world will carry us through.
III. Creative God
We get another handy reason for praising God in verse five:
“The sea is his, for he made it,
and the dry land, which his hands have formed.”
So.....we’ve got the wet things, and the dry things......that
pretty much covers it all, huh? So we’re told that God has made
everything. We’re
given this picture of God acting something like a potter. God forms the
earth with God’s hands.
Picture a child playing in a sand box. You know how they push that sand
around with their hands. They form hills and pat them smooth. They scoop
out deep
channels with their fingers. This is how God is pictured.
Bring in a plate or a vase made by a potter, one where you can see the
ridges of the potter’s fingers left in the clay. When the potter made that piece,
her hands had to touch every surface. Nothing on that pottery escaped the potter’s
hand!
So this is a very intimate picture we see of God. God’s hand has touched
all of creation, and brought it into being.
IV. The Shepherd’s Hand
So God’s hands carry us through the highs and lows of life. And God’s
hands have intimately shaped us and all things. In the second stanza of our psalm
we learn something else about God’s hands (have someone read
Ps. 95:6–7a).
Okay, in ancient Israel, the shepherd was the primary metaphor for a king.
Question: What would a shepherd’s hands mean for the sheep? (Protection,
direction, security)
These were the qualities Israel understood a good king would have. But
the psalmist isn’t applying these qualities to the King of Israel. He’s applying
these to God! And this is going to lead us into next week’s Bible Study,
when we look at the hands of the One we call the Good Shepherd, our Lord Jesus.
Felted Mittens-Week One
Psalm 95:1-7a
O come, let us sing to the Lord;
let us make a joyful noise to the rock of our salvation!
2 Let us come into his presence with thanksgiving;
let us make a joyful noise to him with songs of praise!
3 For the Lord is a great God,
and a great King above all gods.
4 In his hand are the depths of the earth;
the heights of the mountains are his also.
5 The sea is his, for he made it,
and the dry land, which his hands have formed.
6 O come, let us worship and bow down,
let us kneel before the Lord, our Maker!
7 For he is our God,
and we are the people of his pasture,
and the sheep of his hand.
Knitting 202-Felted Mittens - [ TOP ]
Week Two
This week’s class begins with the thumb gusset. Teach them how to “make
one,” creating a stitch from the yarn strand in between the stitches
from the round below. The difference between a left twisting and right
twisting increase
is subtle, and will be lost in the felting process, but this is a good
project for them to practice on and learn some of these subtleties, which
help to transform
an average knitting project into one of excellence.
As they finish the gusset, lead the class through putting the thumb stitches
on a holder or piece of yarn, and teach them how to cast new stitches
onto the needle in the middle of a project (I like the Backward Loop
Cast On).
For the
rest of the class, they’ll just continue knitting in the round
up the length of the hand.
Make sure to walk them through the two different decrease methods for
the top of the mitten, and how SSK creates a left leaning decrease while
K2tog
creates
a right leaning decrease. Again, this subtle difference won’t appear on
the mittens once they’re felted, but this makes it an ideal project
for them to practice all these new skills on.
For their homework, they should knit up to the top of the hand (to the
point where they have 10 sts remaining, five on each of two needles).
Next week’s
class will begin with the grafting of these stitches together. They will need
their yarn needle for next week’s class.
This week’s Bible study focuses on the hands of Jesus and will
utilize the post-resurrection story of the Road to Emmaus.
I. A Bible Tour
Last week we looked at the hands of God, and this week we look at the hands of Jesus. So before we zero in on our Bible reading, let’s take a quick tour through the life of Jesus, and focus on his hands.
A. Baby Hands - We begin in Bethlehem with his birth. Imagine just after he’s born. Mary and Joseph are in the cattle stall, nestled in the straw, and there’s that newly born Jesus, still wet with amniotic fluid. Question: When Mary and Joseph look at him and hold him, what do you suppose they’re doing with his hands? (Counting his fingers, making sure all his parts are there, kissing his hands, kissing him all over)
Little baby hands are so amazing! The fine, tiny finger bones, the perfect little nails. All the parts of a human hand, but incredibly small. And just ponder what those hands are going to do throughout the course of Jesus’ life!B. Childhood Hands - So Jesus grows up in Nazareth. And Joseph is a carpenter. Question: So what do you suppose Jesus’ little boy hands are doing? (Learning the skills of carpentry-how to use a hammer and saw; they have slivers, hammers bang his fingers and thumbs; he’s becoming adept at the skills of the trade).
C. Jesus’ Ministry - Okay, now let’s consider Jesus’ ministry. Question: What sort of things did he do with his hands? Possible responses:
•Touching the untouchable: the dead, lepers, children, “sinful” women.
Consider what they accomplish: Heal, bring life, fully accept
Consider the power of touch•Rebuking the storm
Consider the power in his hands; no mere human hands could turn the events of nature
•Cleansing of the temple
Upturning tables, forming a whip out of cords
What do they see happening in his hands here?D. Jesus’ Arrest and Death - Then we come to the end of his ministry, when he is arrested and crucified. The soldiers will mock him by placing a reed in his right hand, like a kingly staff. And then they’ll slap his face with the reed. And then he’ll have to carry the heavy, rough-hewn cross through town towards the execution site. And when he gets there, the soldiers are going to nail his hands to that cross.
And here on the cross is where we see the full power of his healing hands. What we see is the healing power of forgiveness, and only wounded hands can convey that.
We seek to hurt him, but his wounded hands bring healing forgiveness.
We seek to destroy him, and his hands give us life.
And when we seek to shun him, his hands hold nothing but acceptance for us.
II. Hands for Us
Hand out Bible study sheets. So now our tour of Jesus’ hands
take us to his resurrected hands. And here is where we see his hands
reaching
out and
touching
us even today.
This is an excerpt from the story of the Road to Emmaus. It’s Easter afternoon,
and these two disciples are walking from Jerusalem to Emmaus. Along the way,
they run into this stranger. We know this stranger is Jesus, but they don’t.
And all along the road to Emmaus, Jesus explains to them why the Messiah
had to die.
So then they arrive at Emmaus, and this is where our story continues.
Have someone read the text.
Question: What is Jesus doing with his hands in this story? (He
blesses and breaks the bread) This is when the risen Lord is made known to them.
What
he’s
doing with his hands reveals the resurrected Lord in their midst. And he is made
known to us in this same way! When we celebrate the Lord’s supper,
he is both the host and the meal. The hands that absorbed in all our
sin and brokenness
on the cross and gave us healing forgiveness in return are the same hands
that preside at this meal. Whenever we gather to share in that meal,
the risen Jesus
(that is, the one who has conquered sin and death) is made known to us
in the breaking of the bread. He is in our presence, just as he was in
the presence
of the two disciples in Emmaus.
There’s a communion hymn in the Lutheran Book of Worship that expresses
this very sentiment (LBW #209):
We meet, as in that Upper Room they met.
Thou at the table, blessing, yet dost stand.
“This is my body”; so thou givest yet;
Faith still receives the cup as from thy hand.
It is the hand of Jesus that gives us this meal. Question:
Now, when we celebrate this meal in worship, whose hands give you
the
bread and the wine? (The
hands of the pastor and/or lay distributor)
And here we make our connection with next week’s theme, Our Hands.
We see that our hands become the hands of Christ in this world.
Felted Mittens-Week Two
Luke 24:28_35
......As they came near the village to which they were going, (Jesus) walked
ahead as if he were going on. 29 But they urged him strongly, saying, “Stay
with us, because it is almost evening and the day is now nearly over.” So
he went in to stay with them. 30 When he was at the table with them, he took
bread, blessed and broke it, and gave it to them. 31 Then their eyes were
opened, and they recognized him; and he vanished from their sight. 32 They
said to each other, “Were not our hearts burning within us while he
was talking to us on the road, while he was opening the scriptures to us?” 33
That same hour they got up and returned to Jerusalem; and they found the
eleven and their companions gathered together. 34 They were saying, “The
Lord has risen indeed, and he has appeared to Simon!” 35 Then they
told what had happened on the road, and how he had been made known to them
in the breaking of the bread.
Knitting 202-Felted Mittens - [ TOP ]
Week Three
This week the class will learn three things: how to graft stitches together,
how the felting process works, and how to pick up stitches for the thumb.
Have a pair of mittens made up and ready to felt. I like to bring in a “guest
presenter” and let them teach the felting process (a guest presenter
adds the exotic touch of an “expert.” Have some fun!). This also
allows the guest lecturer to oversee the felting process and frees you up to
continue teaching the class while the mittens felt. We’re fortunate to
have a washing machine at our church, and so we can felt the mittens during
the class time. If you don’t have access to a machine in your class setting,
you’ll just have to tell them about the felting process. But if you can
felt the mittens in your class time, it adds a nice dramatic flair!
While the mittens are felting, teach the class about the Kitchner Method.
Certainly, on a project like this one, you wouldn’t need to graft the stitches together.
But I added this feature so that the class has a chance to become acquainted
with the concept of grafting. And if their tension is a little goofy, it will
all “come out in the wash.” This makes it the perfect project for
them to practice the Kitchner Method.
After they’ve grafted the top of the mitten, tell them how to pick up
the reserved stitches from the palm, and teach them how to pick up the five
extra stitches from the surrounding area. Three of these five stitches will
come from the cast on stitches. Pick up one extra stitch from either side of
these three cast on stitches. These side stitches prevent those irritating
little holes from emerging on either side of the thumb. The class can then
work on their thumb until it’s time for the Bible study.
Today’s Bible Study will focus on Our Hands, and it looks at the story
of St. Paul regaining his sight from Acts 9.
I. Agents of Grace
Last week we looked at the hands of Jesus. He became known to the two disciples
at Emmaus in the breaking of the bread. And when we celebrate communion,
the hands of Jesus preside over our meal, too. He is made known to us in
the breaking
of the bread. But our hands also participate in that meal’s distribution!
God uses our hands as agents of God’s grace! So in our final Bible study,
we look at Our Hands. Hand out the Bible study.
II. The Setting
St. Paul’s relationship with Christianity began as a very different thing.
He was known as Saul, and he was a persecutor of the church. He understood
the Church to be an ugly stain on the purity of Jewish faith. And so he did
everything in his power to wipe it out. He even went so far as to gain permission
to round up these false believers in Damascus and bring them back to Jerusalem,
to face the music. So he was on his way to Damascus when he was struck down
by a vision of Jesus. He heard a voice ask him, “Saul, why are you persecuting
me?” When he got up, he was blind, and he had to be led by the hand into
Damascus.
For three days he was blind. He didn’t eat a thing. Here’s where
our reading begins. Have someone read Acts 9:10–19.
III. Healing Touch
So here’s a touch of irony: Saul has been struck blind, but while he’s
blind, he’s having visions!
Meanwhile, Jesus speaks to a man named Ananias in a vision. He directs
him to go to Saul and heal him. We don’t know much about Ananias. Question:
What do we know about him? (He’s a disciple)
And that’s all we need to know! He is a disciple of Jesus. And Jesus
is going to work through him. Question: What does God tell Ananias to do? (Go
to a certain house and lay his hands on Saul). So Ananias is instructed to
use his hands. God is going to work healing through Ananias’ touch!
Now, God could have healed Saul just as easily as God struck him blind.
But God chooses to work divine healing through the hands of Ananias.
And this
tells us something about divine healing. In its fullness, healing pulls
us into community.
Our hands become agents of God’s healing. Question: When have you seen
God’s healing come through the hands of another person?
Ananias touched Saul. Touch brings inclusion. Saul stood outside
that Christian community. But with a touch, Ananias turns an enemy
into
a brother.
We are all disciples of Jesus, too. And Jesus can use our hands.
Our hands can bring divine healing into the world. With our touch,
we can
become
agents of God’s healing in a sorrowful, broken world. That’s an awesome
realization! GOD CAN USE YOUR HANDS!
So I want to end tonight with a prayer of blessing for your hands.
Instruct the class to hold their hands up to receive a blessing.
Almighty and merciful God, you formed our hands in our mother’s womb.
You have given our hands power, and power beyond just the strength of our sinews
and bones. For you have empowered our hands to be agents of your grace in this
world. And so we ask: In the comings and goings of our daily path, bless our
hands towards your kingdom’s goals. May they be instruments of your compassionate
touch. May they gently guide the lost and despairing. May they shape tomorrow
with your hope. We pray this in the name of your Son, our Lord, whose risen
hands bear the mark of your love. Amen.
Felted Mittens-Week Three
Acts 9:10-19
Now there was a disciple in Damascus named Ananias. The Lord said
to him in a vision, "Ananias." He answered, "Here I am, Lord." 11
The Lord said to him, "Get up and go to the street called Straight, and
at the house of Judas look for a man of Tarsus named Saul. At this moment he
is praying, 12 and he has seen in a vision a man named Ananias come in and
lay his hands on him so that he might regain his sight." 13 But Ananias
answered, "Lord, I have heard from many about this man, how much evil
he has done to your saints in Jerusalem; 14 and here he has authority from
the chief priests to bind all who invoke your name." 15 But the Lord said
to him, "Go, for he is an instrument whom I have chosen to bring my name
before Gentiles and kings and before the people of Israel; 16 I myself will
show him how much he must suffer for the sake of my name." 17 So Ananias
went and entered the house. He laid his hands on Saul and said, "Brother
Saul, the Lord Jesus, who appeared to you on your way here, has sent me so
that you may regain your sight and be filled with the Holy Spirit." 18
And immediately something like scales fell from his eyes, and his sight was
restored. Then he got up and was baptized, 19 and after taking some food, he
regained his strength.
Knitting 202-Felted Mittens - [ TOP ]
• Worsted weight, 100% wool yarn (NOT superwash!) Yardage:
Children’s Mitts-approx 154 yds
Women’s Mitts-approx 232 yds
Men’s Mitts-approx 277 yds• Size 9 double pointed needles, or size needed to make gauge
•Yarn Needle
•Stitch Markers
Gauge
18 sts + 25 rows = 4"
Notes
•Instructions are written for older child (woman, man)
•Instructions are written for three double-point needles.
Abbreviations
• M1R (Make one right slanting): Insert the tip of the left needle, from the back to the front, under the horizontal strand which connects the stitches on the right and left needles. This will form a new loop on the left needle. Knit this loop through the front, which will form a new, right slanting stitch.
• M1L (Make one left slanting): Insert the tip of the left needle, from the front to the back, under the horizontal strand which connects the stitches on the right and left needles. This will form a new loop on the left needle. Knit this loop through the back, which will form a new, left slanting stitch.
• SSK (Slip, slip, knit) Slip two stitches, one at a time, as if to knit. Then slide the left needle through the front of these loops (from the left to the right), and knit them together from this position.
• K2tog (Knit two together): Knit two stitches together as one.
Right Mitten
Cuff
CO 40 (44, 52) sts. Divide onto three needles. Join, being careful not to twist the stitches, and work in K2, P2 rib for 3.5" (4", 4"). The remainder of the mitten will be worked in st st.
Knit 2 (4, 6) rounds. Then rearrange the sts onto the three needles as follows: Needle One: 10 (11, 13) sts; Needle Two: 10 (11, 13) sts; Needle Three: 20 (22, 26) sts.
Thumb Gusset
Row One: K3, place marker, M1R, K1, M1L, place marker, K to end of round.
Row Two: Knit
Cont in this fashion, adding a new stitch just after first marker and again just before second marker on every other round, until there are 9(11, 15) sts bet markers. Knit another round.
Palm
K3, place the sts bet the markers on a holder or piece of scrap yarn, CO 3 sts, K to end of round [42 (46, 54) sts]. Cont knitting in the round until mitten measures 9 _" (11", 12 3/4"). At this point, transfer one st from the Needle Two to Needle Three. This will give you a total of 21 (23, 27) sts on Needle Three.
Top of Mitten
Decrease in the following fashion:
• Row One: On Needle One, K1, SSK, K to end of needle. On Needle Two, K until 3 sts rem, K2tog, K1. On Needle Three, K1, SSK, K until 3 sts rem, K2tog, K1.
•Row Two: Knit
Rep these two rows until a total of 26 (30, 34) sts rem. At this point, dec on every row until 10 sts rem. Transfer all the sts from Needle Two to Needle One. You will have 5 sts on each of the two rem needles. Graft sts tog using the Kitchner method.
Thumb
Pick up the 9 (11, 15) sts from the holder, and divide onto two needles. Knit these sts, and then, with a third needle, pick up 5 sts from back of palm (the three cast on sts, plus one on either side). This will give you a total of 14 (16, 20) sts. K even until thumb measures 2 _" (3", 3 3/4") in length. Then, transfer sts in the following manner:
• Children’s Thumb-move 1 st from Needle Two to Needle Three, and 1 st from Needle One to Needle Three, knitting this last st.
• Woman’s Thumb-move 2 sts from Needle Two to Needle Three, and 1 st from Needle One to Needle Three, knitting this last st.
• Man’s Thumb-- 3 sts from Needle Two to Needle Three, and 2 sts from Needle One to Needle Three, knitting these last 2 sts.Work dec as follows:
Needle One: SSK, K to end; Needle Two: K until 2 sts rem, K2tog; Needle Three: SSK, K until 2 sts rem, K2tog.
Dec on every row, until 6 (4,4) sts rem. Cut yarn and pull through the 6 (4,4) sts.
Left Mitten
Work as per right mitten through the cuff.
Thumb Gusset
Row One: K across Needle One, K across Needle Two until 4 sts rem. Then place marker, M1R, K1, M1L, place marker, K3. K across Needle Three.
Row Two: Knit
Cont. in this fashion, adding a new stitch just after first marker and again just before second marker on every other round until there are 9(11, 15) sts bet markers. Knit another round.
Palm
K across Needle One. K across Needle Two until you come to the first st marker. Place the sts bet the markers on a holder or piece of scrap yarn, CO 3 sts, K to end of round [42 (46, 54) sts]. Cont knitting in the round until mitten measures 9 _" (11", 12 3/4"). At this point, transfer one st from Needle One to Needle Three, knitting this st. This will give you a total of 21 (23, 27) sts on the third needle. Work top of mitten following instr for right mitten.
Thumb
Work acc to instr for right thumb, transferring sts in the following manner:
• Children’s Thumb-move 1 st from Needle Two to Needle Three, and 1 st from Needle One to Needle Three, knitting this last st.
• Woman’s Thumb-move 1 st from Needle Two to Needle Three, and 2 sts from Needle One to Needle Three, knitting these last 2 sts.
• Man’s Thumb-move 2 sts from Needle Two to Needle Three, and 3 sts from Needle One to Needle Three, knitting these last 3 sts.Finish as per right thumb.
Felting
Wash the mittens in hot, soapy water until they are the appropriate size. Finished length is approx 8 _" (9", 10"). Rinse in cool water and lay flat to air dry. Do not put them in a clothes dryer.
[ ADULT ] • [ HOME ]
© Copyright 2004 by the Northwest Synod of Wisconsin Resource Center. Please see our usage policy.
NW Synod of Wisconsin Resource Center